How to Repair Water-Damaged Drywall

Sugar Land Mold Remediation - water damaged drywall
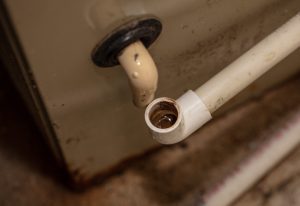
Water damage is a common problem for homeowners, and when it affects drywall, quick action is required. Whether it comes from a leaky pipe, a roof leak, or flooding, water damage can weaken the structure of drywall and make it a good place for mold and mildew to grow. In this article, we’ll discuss how to thoroughly and successfully repair drywall that has water damage.

Assessing the Damage

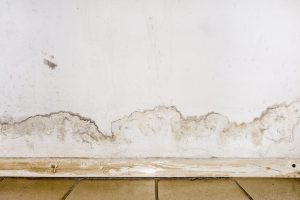
Finding out how serious the issue is is the first step in fixing water-damaged drywall. Look for things like stains, sagging, or a soft, spongy feel. These signs can help you figure out what needs to be fixed right away. Use a moisture meter to find out how much water is in the drywall. This will help you figure out how bad the damage is.

Preparation

It’s important to have everything you’ll need on hand before beginning the repair process. You’ll need a utility knife, a drywall saw, a putty knife, sandpaper, joint compound, drywall patches, screws, a drill, and a paintbrush. Also, make sure you have the right safety gear, like gloves, goggles, and a dust mask, to keep yourself safe.

Removing Damaged Drywall Sections

To fix water-damaged drywall, you have to take out the damaged areas. Cut out the damaged pieces along the edges of the studs with a utility knife or drywall saw. Be careful not to damage any nearby drywall that is still in good shape. Once the damaged pieces are removed, dispose of them properly.
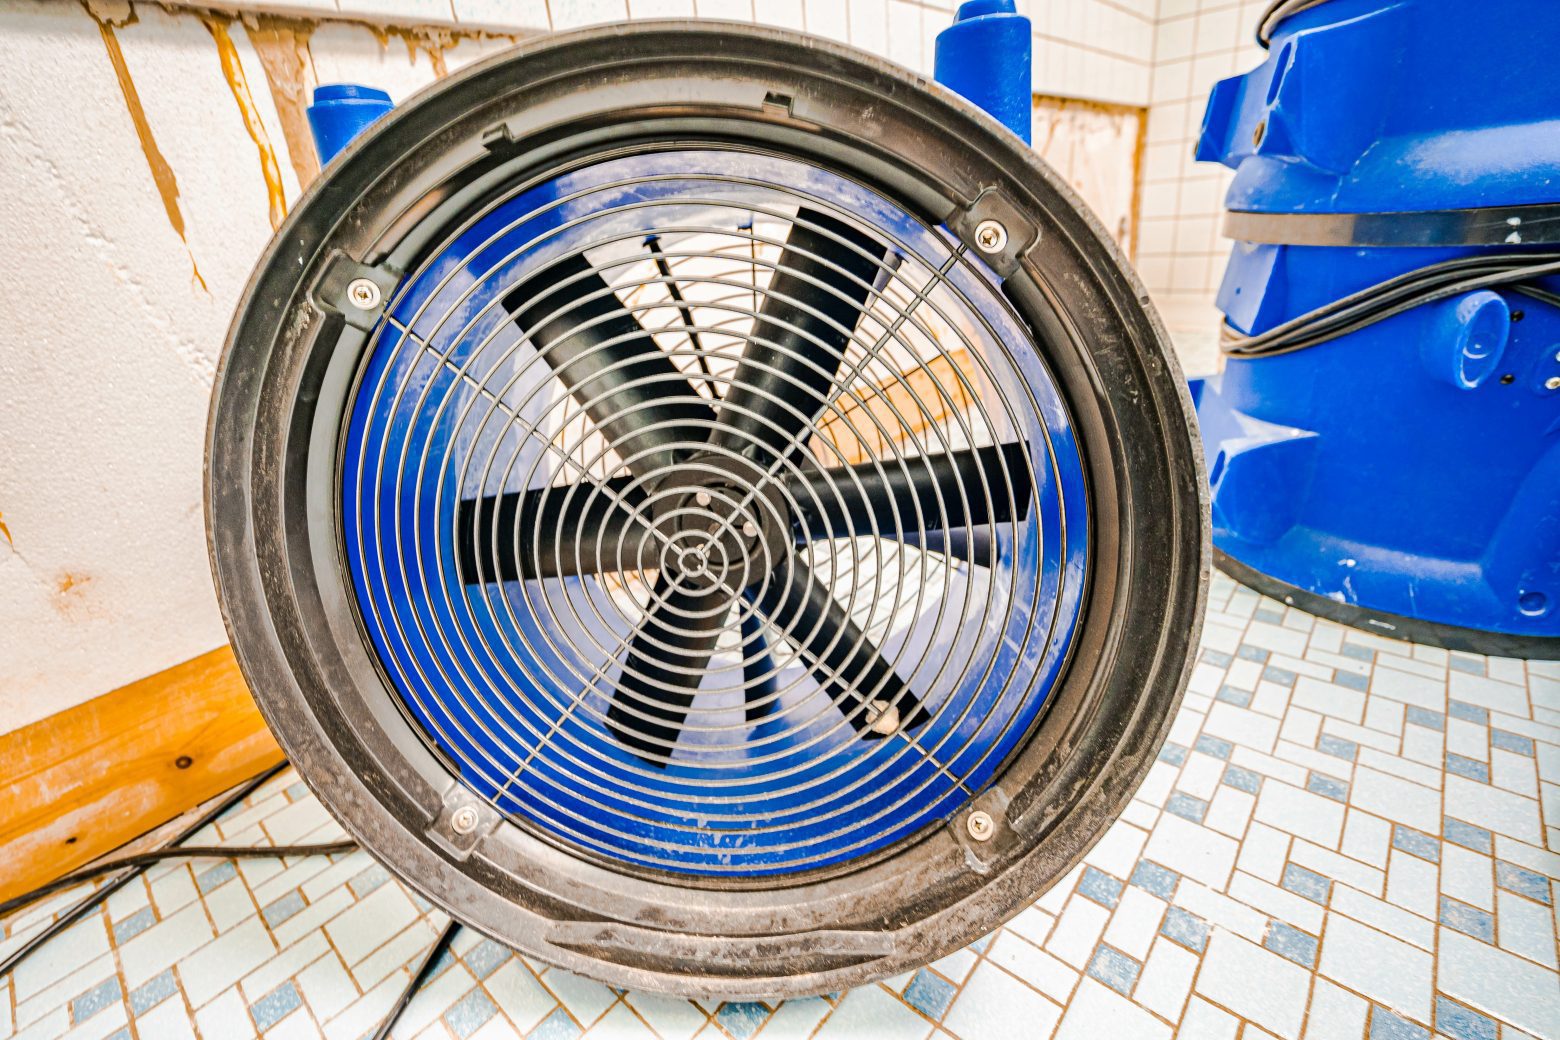
Drying

After taking out the damaged drywall, it’s important to dry the area well to stop mold from growing. Use fans and dehumidifiers to move the air around and speed up the drying process.

Repairing the Drywall

With the damaged sections removed and the area dry, it’s time to repair the drywall. Measure the size of the openings and cut corresponding drywall patches to fit snugly into the gaps. Secure the patches in place using screws or drywall adhesive, ensuring they are flush with the surrounding drywall. Once the patches are in place, apply joint compound over the seams, feathering it out to create a smooth transition between the old and new drywall.

Finishing Touches

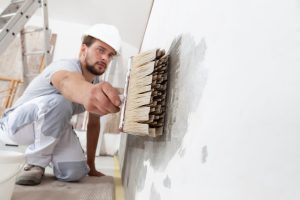
To achieve a seamless repair, sand the patched areas using sandpaper to smooth out any unevenness. Wipe away the dust with a damp cloth and apply a primer to the repaired sections before painting. Once the primer is dry, apply a coat of paint that matches the surrounding wall color to further blend the repaired area with the rest of the wall. Let the paint dry completely before you judge how it turned out.

Conclusion

Repairing drywall that has been damaged by water is a job that needs attention to detail and good execution. By following the steps in this article, you can effectively fix your walls and make them look nice again. However, it’s important to note that in some cases, water damage may be extensive or accompanied by structural issues. When this happens, it’s best to get help from a professional to make sure the damage is completely fixed.

Remember, prevention is always better than cure. Fix any leaks or plumbing problems in your home right away to prevent water damage to your drywall in the future. Check your roof and gutters regularly for signs of damage or clogs. Maintaining a dry environment and taking care of water problems quickly will help keep your drywall in good shape and prevent damage.

Discover effective ways to keep your home or office moisture-free and get rid of mold with Pure Maintenance of Texas. Contact us today!


Microfiber Towels to the Rescue!

Microfiber Towels to the Rescue!

If you’re proud of how clean your home is, you probably know that old, worn-out cotton towels and sponges can make things worse instead of better. Instead, many people are using microfiber towels to clean their homes, and it’s easy to see why. Because of their unique design, microfiber towels are made to clean almost any surface without leaving behind a film or scratching it. This makes them perfect for cleaning windows, kitchen counters, and floors. Let’s talk about why microfiber towels are so popular with homeowners and the many ways they can help.

Microfiber Towels are Absorbent

One of the best things about microfiber towels is that they soak up a lot of water. Unlike traditional sponges and cotton cloths, microfiber towels are made of polyester and nylon and can hold up to seven times their weight in water, making them perfect for cleaning up spills, stains, and other tough messes. Because they are so absorbent, they can also clean without leaving streaks or watermarks. So if you want to achieve a spotless finish every time you clean, microfiber towels are the way to go.

Microfiber Towels are Reusable

If you’re tired of buying new sponges and cleaning cloths every time, you’ll be happy to know that microfiber towels can be used more than once. A single microfiber towel can last for years if properly cared for, which not only saves you money in the long run but also helps to reduce waste. To further reduce waste, microfiber towels can be washed and reused in the washing machine.

Microfiber Towels are Gentle on Surfaces

Microfiber towels are gentler on surfaces than other types of cleaning cloths. Because of how they are made, they don’t leave scratches or streaks, even on surfaces like windows and mirrors that are easy to damage. This makes them a popular choice for homeowners who want a clean finish without damaging their surfaces.

Microfiber Towels are Versatile

Another benefit of microfiber towels is that they can be used for many things. They can be used to clean almost any surface, from sinks and countertops to floors and furniture. Many people even use microfiber towels to clean their cars or bikes. Because they can be used for so many different cleaning jobs, you can save money by doing more with them. This makes them a great investment for any homeowner.

Microfiber Towels are Hygienic

Finally, it’s worth noting that microfiber towels are incredibly hygienic. Because they’re so absorbent, they trap bacteria and other germs, which means they don’t spread them around as you clean. Also, microfiber towels hold a positive charge, which attracts the negative charge of dust and even mold spores. They can also be washed at high temperatures, which kills any bacteria that might be on the surface, but without detergent. The best way to launder a microfiber towel is to wash it in hot water with one cup of white vinegar and then rinse it in cold water. Allow them to air dry instead of using the dryer. This makes them a great choice for anyone who wants a clean, germ-free home.

In conclusion, using microfiber towels to clean your home has many benefits. They’re absorbent, reusable, gentle on surfaces, versatile, and hygienic—what more could you want from a cleaning cloth? If you’re looking for an effective and sustainable way to keep your home clean, we highly recommend investing in microfiber towels. With the right care, they’ll last for years and help you achieve a spotless finish every time you clean!

Discover the Power of Microfiber Towels and Pure Maintenance of TexasContact Us Now to Learn More!


How to Keep AC Drain Lines Clear

condensation drain has become plugged and must be cleaned - Sugar Land Mold Remediation


You rely on your air conditioning system during the hot summer to keep your home comfortable. However, a clogged AC drain line can lead to various problems, including water damage, mold growth, and reduced AC performance. Fortunately, there are several steps you can take to keep your AC drain lines clear and functioning properly.

What is an AC drain line?

Let’s quickly go over what it is and what it does before talking about how to keep your AC drain line clear. The AC drain line is a small pipe that runs from your air conditioner’s evaporator coil to the outside of your home. Its purpose is to remove condensation that forms on the coil during the cooling process. Without a functioning drain line, this moisture would build up and eventually cause water damage or other problems.

Why do AC drain lines get clogged?

AC drain lines can become clogged for a variety of reasons, including:

  • Dirt and debris buildup: Over time, dirt, dust, and other debris can accumulate in the drain line, causing clogs.
  • Algae and mold growth: The dark, damp environment inside the drain line can be a breeding ground for algae and mold, which can quickly clog the line.
  • Poor installation: If the drain line is not installed properly, it may be more prone to clogging.
  • How to Keep Your AC Drain Line Clear

Now that we know why AC drain lines get clogged, let’s discuss some steps you can take to prevent clogs and keep your drain line clear.

Change Your Air Filter Regularly

One of the simplest and most effective ways to prevent AC drain line clogs is to change your air filter regularly. A dirty air filter can reduce airflow and increase moisture buildup, contributing to drain line clogs. Aim to change your air filter every 1–3 months, depending on your usage and type of filter.

Clean the AC Drain Lines

Cleaning the AC drain line is another important step in preventing clogs. To do this, locate the drain line outside your home (it will be a PVC pipe near your outdoor unit) and gently flush it out with water. You can use a garden hose or a special attachment designed for this purpose. Be careful not to use too much pressure, which could damage the line. If you notice any visible clogs, you may need to use a pipe cleaner or call in a professional to clear the line.

Use Algaecide Tablets

As we mentioned earlier, algae and mold growth can quickly clog an AC drain line. To prevent this, you can use algaecide tablets, which are small tablets that dissolve slowly and release chemicals that prevent algae and mold growth. Simply drop one or two tablets into the drain pan monthly during the cooling season.

FAQs

Q: How do I know if my AC drain line is clogged?

A: Some signs of a clogged AC drain line include water leaking from your indoor unit, musty odors, and reduced AC performance. If you see any of these signs, you should check your drain line and clean it if necessary.

Q: Can I use vinegar or bleach to clean my AC drain line?

A: While vinegar or bleach can effectively kill mold and algae, they can also harm your AC drain line if used improperly. Vinegar and bleach are both acidic and using too much of either substance or leaving it in the drain line for too long can damage the PVC material of the line for use in AC drain lines. Instead, we suggest using an algaecide product that is made to be used in air conditioner drain lines.

Q: Do I need a professional to clean my AC drain line?

A: In most cases, you can clean your AC drain line yourself using the steps we outlined above. However, if you’re uncomfortable doing so or notice any major clogs or other issues, it’s best to call a professional HVAC technician to inspect and repair your system.

Q: How often should I clean my AC drain line?

A: We recommend cleaning your AC drain line at least once per year, ideally before the start of the cooling season. However, if you live in a particularly humid or dusty area, you may need to clean it more often.

Q: Can a clogged AC drain line cause other problems besides water damage?

A: Yes, a clogged AC drain line can lead to reduced AC performance, as well as increased energy bills and mold growth. It can also create an environment for insects and other pests to thrive.

In conclusion, keeping your AC drain line clear is important to maintaining your air conditioning system and preventing water damage and other issues. By following these simple steps and being mindful of signs of a clogged drain line, you can keep your home cool and comfortable all summer long.

Prevent water damage and mold in your home with a clear AC drain line! Reach out to Pure Maintenance of Texas for the expertise you need.

Is Mold On Shoes Dangerous?

Is Mold on shoes dangerous? Moldy harness boot. Close-up. Is mold on shoes dangerous? In this article, we’ll talk about what makes shoes in closets grow mold and how to stop and eliminate it. 

How Your Shoes Get Moldy

Mold thrives in moist environments, making shoes in a damp, dark closet an ideal breeding ground. When shoes become wet or damp, mold spores can settle on them, causing mold to grow. Leather shoes are particularly vulnerable to mold growth since leather can absorb moisture easily.

Can Moldy Shoes Be Saved?

If caught early, mold on shoes can sometimes be cleaned off using a solution of one part white vinegar to three parts water. You should use a soft-bristled brush to clean the affected area and then air dry the shoes. However, if the mold has penetrated deeply into the shoes, they may need to be discarded. It’s crucial to note that mold can cause respiratory issues and allergic reactions. If you’re handling moldy shoes, wear protective gear and dispose of them carefully to avoid spreading mold spores.

Preventing Mold on Shoes

Maintaining dry conditions is essential to preventing mold growth on shoes. Here are some tips:

  • Always wear clean, dry socks with your shoes. This helps absorb moisture and keeps your feet dry.
  • Let shoes dry completely before storing them in the closet. Stuffing them with newspaper can help absorb moisture and speed up the drying process.
  • Avoid storing shoes in damp, humid environments. Store them in a well-ventilated closet or shoe rack if possible.
  • Reduce moisture levels in your closet or basement by using a dehumidifier.
  • Consider using a shoe dryer, which uses heat to dry shoes quickly and thoroughly.

Cleaning Mold from Your Closet

Mold on shoes in the closet often indicates the presence of mold elsewhere in the closet. Here’s how to clean it up:

  • Take everything out of the closet, including clothes, shoes, and other items.
  • Clean all surfaces with a solution of one part white vinegar to three parts water to kill any mold spores.
  • Let the closet air dry completely before returning items to it.
  • Put a dehumidifier in the closet to reduce the amount of moisture and stop mold from growing in the future.

FAQs

Q: Is mold on shoes dangerous?

A: Mold can cause health problems, including respiratory issues and allergic reactions. If you have moldy shoes, throw them away carefully and wear protective gear to stop the mold spores from spreading.

Q: How can I prevent mold on leather shoes?

A: Shoes made of leather are especially likely to grow mold because they soak up water easily. To prevent mold on leather shoes, wear clean, dry socks with them, avoid storing them in damp, humid environments, and use a leather conditioner to help repel moisture.

Q: Can I use bleach to clean moldy shoes?

A: While bleach can effectively kill mold, it can also damage certain materials, such as leather and suede. Instead of bleach, it’s best to clean your shoes with a mix of white vinegar and water.

Q: How often should I clean my closet to prevent mold?

A: Clean your closet at least once a year to prevent mold growth. If you live in a humid or wet area or see mold growing on your shoes or clothes, you may need to clean them more often.

Q: Can I store my shoes in plastic containers to prevent mold?

A: Plastic containers can keep moisture out, but they can also trap moisture inside, which can help mold grow. The best place to store your shoes is in a dry, well-ventilated closet or shoe rack; a dehumidifier can help.

Q: Can I dry my shoes with a hairdryer? 

A: While a hairdryer can effectively dry shoes quickly, it can also damage certain materials, such as leather and suede. The ideal scenario is for your shoes to air dry in a well-ventilated area.

Q: How can I tell if my shoes have mold?

A: Mold can appear as fuzzy or slimy spots on shoes and cause a musty odor. If you suspect your shoes have mold, inspect them closely and take action to clean them and prevent future growth.

In conclusion, a common problem with shoes in closets is mold. Keeping shoes dry and in a well-ventilated area can help prevent this. If you notice mold on your shoes, take action to clean them and prevent further growth. Following the tips in this article, you can keep your shoes and closet mold-free and ensure a healthy living environment.

Want to keep your shoes looking great, even in humid conditions? Pure Maintenance of Texas can provide valuable information on mold prevention and removal – contact us today!


Why Painting Over Mold is a Big No-No

construction worker painter man with protective helmet, brush in hand restores and paint the wall, inside the building site of a house, closeup - Painting over moldMold can be a homeowner’s worst nightmare. It’s not only unsightly, but it can also pose a serious health risk to you and your family. If you’ve ever discovered mold in your home, you might be tempted to paint over it and call it a day. However, this is never a good idea. In fact, it can make the problem much worse. In this article, we’ll explain why painting over mold is ineffective and what you should do instead.

Why Does Mold Grow?

Before diving into why painting over mold is a big no-no, let’s first understand how mold grows. Mold loves damp environments, making any consistently wet or moist area prone to mold growth. Common areas susceptible to mold growth include bathrooms, kitchens, basements, and areas that have experienced water damage. When mold spores land on a damp surface, they can quickly grow and spread, releasing more spores into the air.

Why is Painting Over Mold Ineffective?

Now, let’s return to the question: can you paint over mold? The answer is an emphatic no. Painting over mold will not solve the problem, as the mold will continue to grow and spread underneath the paint. This can make the problem even worse, as the mold can release more spores into the air, potentially causing health issues for you and your family.

Moreover, painting over mold can trap moisture in the affected area, creating a perfect environment for the mold to thrive and spread. This can create a dangerous cycle where the mold continues to grow and spread, potentially causing structural damage to your home and posing a health risk to anyone living there.

What Should You Do Instead?

If you have mold in your home, it’s essential to address the problem directly. This means hiring a professional to properly remove the mold and treat the affected area with a mold-killing solution. Depending on the extent of the mold growth, this may involve removing affected materials like drywall, carpet, or insulation.

It’s also essential to address the underlying cause of mold growth. This can include fixing leaks or drips, improving ventilation in damp areas, and using mold-resistant products in areas prone to moisture.

Can You Clean Up Mold Yourself?

While it might be tempting to clean up mold yourself to save money, it’s not recommended. Mold spores can become airborne during the cleaning process, potentially causing health issues for anyone in the area. Additionally, without proper training and equipment, it can be difficult to fully remove the mold and address the underlying causes of the growth.

If you do decide to clean up mold yourself, be sure to wear protective gear like gloves, goggles, and a mask to avoid breathing in the spores. However, in most cases, it’s best to leave mold remediation to the professionals.

What About Mold in Rental Properties?

If you’re a tenant and you discover mold in your rental property, it’s important to notify your landlord as soon as possible. They are responsible for addressing the issue and ensuring that the mold is properly removed. If they fail to take action, you may need to escalate the issue or even consider legal action.

Preventing Mold Growth

The best way to deal with mold is to prevent it from growing in the first place. This means taking steps to control moisture in your home and improve ventilation in damp areas. Some tips for preventing mold growth include:

  • Using a dehumidifier in areas that are prone to moisture
  • Fixing leaks and drips as soon as they occur
  • Cleaning up and drying any areas that become wet as soon as possible
  • Using mold-resistant products ensuring proper ventilation in bathrooms, kitchens, and other areas that generate moisture
  • By taking these steps, you can reduce the likelihood of mold growth in your home and keep your family safe.

FAQs About Painting Over Mold

Q: Can you paint over mold with a mold-resistant paint?

A: No, even mold-resistant paint will not solve the problem. Painting over mold will only temporarily hide the issue and can worsen the problem in the long run.

Q: What are the health risks of mold exposure?

A: Mold exposure can cause a variety of health issues, including allergic reactions, respiratory problems, and other serious health conditions. It’s important to address mold growth immediately to prevent these health risks.

Q: How can you tell if you have mold in your home?

A: Some signs of mold growth include musty odors, visible mold growth, and the presence of water damage or dampness. If you suspect you have mold in your home, it’s essential to have it inspected and addressed by a professional.

Q: Can you clean up mold with bleach?

A: While bleach can effectively kill some types of mold, it’s not always the best solution. Some types of mold require specialized treatment, and bleach can actually make the problem worse in some cases.

Conclusion

Painting over mold is never a good idea. It may seem like a quick fix, but it will only hide the problem temporarily and can make the problem much worse in the long run. If you suspect mold in your home, it’s important to address the problem directly by hiring a professional to remove it and treat the affected area with a mold-killing solution. It’s also important to address the underlying causes of mold growth to prevent it from returning.

By following the tips in this article and working with a professional when necessary, you can keep your home mold-free and safe for you and your family.

Keep your home safe and secure from the dangers of mold with help from Pure Maintenance of Texas! Learn more about how to proactively prevent and remedy any potential issues now. Contact us today!

Do I Need to Replace Wet Drywall?

Flooding rainwater or floor heating systems, causing damage, peeling paint and mildew - Do I need to replace wet drywall?

If you recently had a water leak in your home, you may wonder if the wet drywall needs replacing. It’s essential to understand when it’s necessary and when it’s safe to dry out the wall and move on. 

Let’s look at some of the considerations you should consider when deciding whether to replace wet drywall.

When is Replacement Necessary?

The initial step is to inspect and evaluate any resulting damage to assess the full impact of a water leak. If it was only minor, you could get away with drying out the drywall and not needing a replacement. 

However, if there are large amounts of water or any visible mold, then replacing wet drywall would be your best option for ensuring that your family remains safe from any potential health risks posed by mildew or mold.

Additionally, suppose your walls have been exposed to excessive moisture for an extended period of time. In that case, they may have lost their structural integrity and must be replaced regardless of any visible mold or mildew.

What To Do Before Replacing Wet Drywall?

If you do decide that it’s necessary to replace wet drywall, you must take some preliminary steps before doing so. 

First, ensure all standing water has been thoroughly removed from inside and outside the wall cavity (if applicable). Then use fans or dehumidifiers to ensure that all moisture has been completely eliminated from the area before beginning work on replacing the damaged pieces of drywall. 

You should also ensure that any insulation between wall cavities has been adequately dried. If left wet for too long, this can become a breeding ground for mold and other harmful bacteria. 

Finally, consider having a professional team inspect your walls for any additional damage — such as water-related damage done to electrical wiring — before replacing wet drywall to avoid any potential hazards down the line.

As we have seen, replacing wet drywall can prevent further damage caused by water leaks and reduce potential health risks associated with mold growth due to prolonged exposure to moisture. 

However, before returning any wall material, ensure that all standing water has been removed and proper drying procedures have been taken to ensure safety. 

Conclusion

Whether you choose to replace wet drywall yourself or hire a professional depends mainly on how extensive the damage is – but either way, this task must be completed correctly to protect your family’s health and ensure the maximum longevity of your home’s walls!

Is your drywall water-damaged? Get the help you need now! Contact Pure Maintenance of Texas to start restoring and protecting your walls.